Australia
Maps based in Australia.
15 files
-
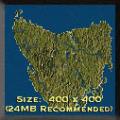
Goal: Tasmania - Australia's 'Apple Isle' is set to become a major supplier of food to the mainland's cities.
Author's Comments: Rail in Tasmania was somewhat confined to the northern townships for much of the latter part of the Nineteenth Century. Although the first lines were established over a decade earlier than this game's commencement, these early lines were generally very short and did not encompass the expansive network that the successful player must construct in this scenario. The names of the 'robbers' used in the scenario were largely sourced from Australian bush rangers in Tasmania whose time of notoriety was also some years earlier than this scenario's starting date of 1895 (apologies to the purists!). While fresh produce was a major business in Tasmania at the time, it was in fact wool that was the principal industry - as such, wool is included as an export commodity at ports.
By Cam Hills197 0 -
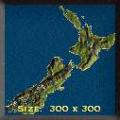
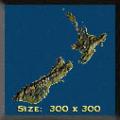
Goal: Welcome to New Zealand, one of the most exciting countries of this world.
Author's Comments: This map is a pretty accurate map of New Zealand, with the geography and topography modeled as closely to the original as possible. I also tried to place the right industries into the right regions.
220 0 -
Goal: A busy world of supply and demand, but unfortunately a dearth of town planning. An efficient rail system could be the answer!
Author's Comments: Starting Year
Min: 1850
default: 1900
max: -
Map size: 102 x 59
Map base: scanned the street directory!
Territories: no
Restrictions: no bankruptcy
Players/managers/engines available: all
Single player game
Computer players: min 0, max 4
Gold: carry 100+ loads of products within a year, $10M in industry profits
Silver: 75 loads, $5M industry profits
Bronze: 50 loads
Loss: <50 loads or debt at end
All within 20 years; company must be debt-free at end.
Multiplayer: not designed for MP
Notes
What I was after here was a smallish map that demands good coordination and an efficient setup. It's easy to run a successful company here - lots of supply and demand close together - but to move enough loads within a short space of time demands more careful thought!
You get no points for moving raw materials, passengers or mail - though you still get paid and you'll have to start with the latter to get some money going. Credits are gained for carrying products - ie, timber (lumber!), steel (double points), goods, cars, tyres, cement, food, paper, fertilizer, aluminum, diesel, alcohol.
Your credit rating will suffer if you're caught owing more than $2M - including cash debt. I didn't design this with financial funny business in mind, so it might not work well playing that way.
The map is tweaked to work well at the default year; it tends to get harder as you move earlier or later. In concept there are no competitors but they're handy for making it more challenging.
The map is based on the real Port of Melbourne and the industries of the suburbs, although I had to be a bit liberal with placing raw materials and factories to get enough in. At the time the map is set rail was the only viable transport, and if you go to the older suburbs you can still see old rails set into streets and close to every factory. All now killed by economics, of course; a modern map would have to be based on bulk movement of just a few materials such as grain or steel.
Playing tips: Loco choice can be crucial here, as speed is important but a breakdown on a busy artery can be fatal. Steel and/or aluminum are crucial because of the other products they enable, as well as they points they earn in their own right. Some stations will become very busy - if possible place them so that express through lines can be added later to bypass them. Don't forget to buy industries as they become profitable.
Have fun; I'd be glad of any feedback. (Thanks to SB who hated it deeply but still made some pertinent comments.)
By Peter Bennet160 0 -
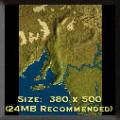
Goal: South Australia: begin with European settlement and build a thriving colony for the Empire! (Or perhaps start a new republic ...)
Author's Comments: Starting year
Min: 1836
Default: 1856
Max: -
Map size: 380 x 500
Location: South Australia (centre & south-east of state)
Map base: topographic map
Version: TSC
Restrictions:
SP/MP: designed for single player (but should suit multiple use)
Win conditions
Bronze: Have 50 game points at 40 years (see below), no debt
Silver: Have 75 points at 40 years, no debt
Gold: Gain 100 points anytime, no debt
Loss: <50 points or debt at 40 yrs
Version 1 notes: Accuracy in topography and history was an important aim for me here. South Australia was settled by Europeans in the 1830s; the first railway was built in 1856, linking Adelaide (the capital) with its port (hence the game's start date). The State quickly became a major producer, first of wool and wheat, and then of minerals such as copper, silver, lead and zinc. A large number of immigrants from Germany began the now world-famous wine production industry, with the main areas reflected in the map. More recent history has seen the exploitation of uranium and oil resources as well, but you won't see those unless you play the game late.
The game is based on this pattern of development. Game points are awarded as follows:
* For each year in which at least 20 loads of minerals are hauled (iron, coal, gravel, bauxite, uranium, oil): 1 point
* For each year in which at least 10 loads of wine (alcohol) are hauled: 1 point
* For each year in which at least 10 loads of grain are hauled: 1 point
* For each year in which at least 10 loads of wool are hauled: 1 point
* For connecting Adelaide with each of these towns, 2 points: Leigh Creek South, Mt Gambier, Port Lincoln, Broken Hill.
There are also bonus points for completing tasks during the game.
You could of course just shift these loads to the nearest station ... but the intention is to take them to a legitimate destination! Wool and grain can be taken to ports for export, as well as to the normal destinations. There are lots of places you can start - try Whyalla/Port Augusta, Adelaide, Coonawarra. It can take a surprisingly long time to get the system busy enough to reliably deliver enough loads, so don't muck around! Watch out for bottlenecks, too. Have fun!
Version 2 notes: A lot of fiddling with settings to make a challenging game. It's not hard to run a company or make money, but it is hard to keep enough of those loads rolling year after year. So the game is about running a large and above all EFFICIENT rail system.
The biggest trap is bottlenecks. It doesn't take long to get enough trains and sources - but I often was dismayed to find dozens of trains stacked up waiting to get into a destination, and no loads getting through. So take care in planning your routes around ports, mills etc - you'll often need multiple stations and clever track laying. The AI isn't into this kind of thing so computer companies are little more than a nuisance.
By Peter Bennet213 0 -
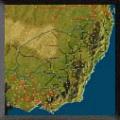
Goal: In the late 1950's, NSW railways were poorly run and under utilized. You've been given the opportunity to standardize the system and reap great rewards.
Author's Comments: Here is a map of south eastern Australia. I have recreated 90% of the rail lines as they have actually existed including correct names of towns and industries.
202 0 -
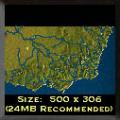
Goal: It's a great state! But it's transport is in a terrible state!
Author's Comments: Starting Year
Min: 1845
default: 1850
max: -
Map size: 500 x 306
Map base: South-east Australia, topographic map
Territories: yes (list at end of notes)
Restrictions: no buying short and selling long (or is it the other way around?)
Players/managers/engines available: all
Single player game
Computer players: min 0, max 4
Gold: 60 points (see below)
Silver: 45 pts
Bronze: 30 pts
Loss: <30 pts
All within 30 years; company must be debt-free.
Multiplayer: not designed specifically for MP
Notes
Victorian Railways did, of course, actually exist for over 100 years as the government-owned rail system for the Australian state of Victoria. In latter years it was known as VicRail and V-Line before being broken up and sold off to private interests in the 1990s. It is of little comfort to us now that this is not proving to be a very successful arrangement!
This is a reasonably accurate map covering Victoria, a fair bit of New South Wales and a smidgin of South Australia. To get it I scanned a topographic map, traced the contours in Photoshop (using layers), filled them with shades of grey and blended the boundaries to get smooth transitions. A lot of work, but it makes a very satisfactory base for RRT maps. (A good trick is to trace the rivers with Photoshop's burning (darkening) tool - it's then dead easy to build the river along the resulting groove with the RRT editor, then level the banks to leave just a slight depression on either side.)
Victoria's economic and historic development was very strongly centred on Melbourne, and the game models this. Your task is to build up the state's transport system and carry large numbers of loads between Melbourne and the rest of the state. You score points for doing this, with loads coming from greater distances scoring proportionately more value. For example, it takes about 44 loads between Melbourne and Geelong to earn a point, but only 4 between Melbourne and Sydney. It takes a while to build up, but later in the game they increase quite rapidly.
Because of an apparent inability in the game's variables to cope with fractions, you actually get no points until you are over these threshold values. Be patient; as your load totals increase you get full credit!
Points are accrued for loads between Melbourne and other defined territories. However, just so that things don't get out of balance, you need to build your system through country Victoria as well. You get no points for this, but you need the raw materials to support the industries in the territories.
Watch out also for droughts, bushfires, depressions, ravening invertebrates, greedy governments and the rest. They can be nasty!
Feedback welcome. Have fun!
By Peter Bennet201 0 -
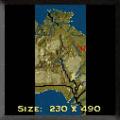
Goal: February, 1942: the Japanese are approaching Australia's northern shores.
Darwin needs reinforcement - can you revitalize and link 2 dilapidated narrow-gauge lines to get the goods across the continent?
Author's Comments: Starting date: fixed at February 1, 1942 (slow time)
Finish: February 28 (midnight), 1942
Map size: 230 x 490; one square = 6.4 km
Map base: scanned topographic map, traced contours in Photoshop
Territories: 22
Restrictions: no financial dealings apart from bond issue and company merger
Players/managers available: all
Single player game
Computer players: no
Gold: achieve 13 goals (of 13)
Silver: achieve 9 goals
Bronze: achieve 5 goals
Loss: <5 goals or debt at end
All within 28 days; company must be debt-free at end.
Multiplayer: no
Acknowledgments: Thanks to Mr Mathy, Gwizz and Darrick for constructive comments!
By Peter Bennet159 0 -
Goal: A disastrous earthquake in 2008 brought New Zealand to its knees.
The situation has stabilized, but without a viable rail network, reconstruction will be impossible.
Author's Comments: RENEWED ZEALAND is a short scenario, running from 2010 through 2025. You must help rebuild the nation following a major earthquake and a series of devastating tsunamis in 2008. Your goal is to move cargo to assist the reconstruction effort; passengers and mail are profitable, but they don't count toward the tonnage you must transport.
As New Zealand Rail is a national railroad -- essentially a subsidiary of the government -- its stock is not publicly traded. You will not be able to play the market or raise money by issuing stock. There are no competing AI companies and you can't resign to start a new company, so you won't miss anything by not being able to buy and sell stock. You may issue bonds if need be, but all company debts must be paid off in order to qualify for any medal win.
New Zealand boasts significant mineral reserves but no fossil fuels. While coal mines are thus arguably inappropriate for this scenario, they are included as a concession to the game's industry model (it was either that or use ports). Within the logic of the scenario, if you will, either circumstances demand that all the coal must be dedicated to powering cities and industries, or else it isn't really coal at all but instead represents some other mineral that's actually mined in New Zealand. Either way, the practical effect you must deal with is that New Zealand Rail is restricted to buying electric locomotives which can draw their power from those hydroelectric dams that survived the Big Shake of Aught-Eight.
Note that there is no prohibition against laying unconnected track. If the distribution of industries at the outset of a game is unfavorable, you may find it advantageous to build simultaneously on both the North and South Islands.
214 0 -
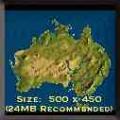
Goal: How would you develop Australia?
Well you can do what you want but don't forget to connect Sydney to Perth by 1930.
By Guest219 0 -
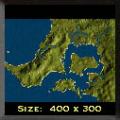
Goal: Westernport Bay in south-eastern Australia: a natural port surrounded by rich primary production. (suggest start either 1880 or 1920)
Author's Comments: Starting year
Min: 1880
Default: 1880
Max: 1920
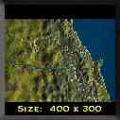
Map size: 400 x 300
Location: Westernport Bay, south-east of Melbourne, Victoria, Australia
Map base: from a satellite photo found on the web
Version: TSC
Restrictions: based on a government rail system, so no stock market trading or shenanigans
SP/MP: designed for single player
Win conditions (in 30 years)
Bronze: connect Melbourne to Morwell
Silver: as above, plus connect Melbourne to Sorrento and carry 20 loads between; no debt
Gold: as above, plus connect Melbourne to Wonthaggi and carry 20 loads between; no debt
Loss: none of above in 30 years
Version 2 Notes: A lot of changes, including making the medals work (!). 2 versions of the game, selectable in the initial window: an easy one beginning in 1880, and a somewhat harder version beginning in 1920 and restricted to electrical traction (there is extra startup cash to compensate for higher track laying costs). The original version was much too easy, so this one has been tightened up a lot - eg no borrowing, you have to earn it! More extensive reporting through status window, too, and more events. Found out some interesting things, such as that logging camps only appear if you plant certain types of trees (the piney-looking ones). Thanks to people who gave feedback!
Version 1 Notes: This is my first map ... it's moderately realistic, although some of the terrain is deduction from road maps as I couldn't find a suitable topographic map (the original satellite photo was coloured by land-use, so there were some funny effects when it was imported). It's not too hard - just remember it's a largish map, so it will take a lot of time for those 20 loads to get through.
The order of the game is pretty much determined by the goals; start in the NW corner, then go for Morwell, then Sorrento, then Wonthaggi. You can start either at the default date, or in the 20s when electric power becomes worthwhile; carrying coal to the power stations at Morwell reduces the cost of electricity to run trains. Connect in plenty of time - it takes ages to get from corner to corner! There are several alternative paths available for the long-distance routes. The steel mill at Long Island is a good little earner, although not required to meet goals.
Feedback welcome!
By Peter Bennet208 0 -
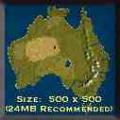
Goal: A land of sparse population and vast distances where only the strong and shrewd survive. This is a modification of a map we did for the demo game.
By Guest195 0 -
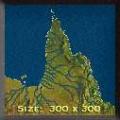
Goal: Far North Queensland has a diverse landscape. From Bauxite around Weipa, the Rainforests of the Daintree, the Sugar Plantations of the coast and the Mines of Mount Isa offer a variety of options to explore.
Author's Comments: This is my first attempt at using the RRT2 editor. At first all I wanted to do was experiment but it ended up being a complete MAP. I actually learnt quite a bit about Queensland's history in planning the map. (like the fact that there was once a plan to form 3 separate states before the turn of the century.)
The scenario is based on the area immediately to the north of Townsville <-> Mt Isa (also known as the Great Northern Line) I have never been north of Rockhampton so I cannot be certain of many of the landscape details.
Much of the landscape is a rough approximation from the 1 to 1 million Topographic series & some 1960's vegetation maps.
167 0 -
Goal: Pilbara ranges, North-west Australia. Pretty dry, pretty hot, but lots of iron out there...
Author's Comments: Starting year: 1964 (compulsory)
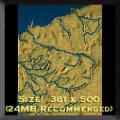
Map size: 381 x 500
Location: Pilbara Ranges, north-west coast of Western Australia
Map base: topographic atlas (traced in Photoshop)
Version: TSC
Restrictions:
Issuing stock
Becoming chairman of another company
Starting multiple companies
Penalties for company debt (including cash) over $2M.
SP/MP: designed for single player
Win conditions (in 30 years)
Bronze: 2 victory points, no debt at end, $5m company book value
Silver: 4 victory points, no debt at end, $20m company book value
Gold: 6 victory points, no debt at end, $40m company book value.
Loss: <2 points or <$5m CBV or debt at end; losing control of company or becoming bankrupt
Victory points: as in reality, you have to build the 3 iron routes:
Pannawonica to Wickham
Tom Price to Dampier
Newman to Port Hedland
Each earns $1m and 2 victory points - half on completion of line, and the rest when 200 loads have been transported between the terminal territories. Any order.
There are benefits from carrying lots of iron ore, as well as sundry penalties and bonuses as the game proceeds.
Notes - V1: Topography should be reasonably accurate, although the rivers were a bugger! The events follow history with some accuracy. Transport of iron ore in the Pilbara is one of the biggest rail movements in the world, with 3 separate companies each running dedicated lines (2 recently merged to capture some obvious savings by reducing duplication) over hundreds of kilometres to the coast. Equipment is mostly US loading gauge and pattern, and therefore incompatible with the more modest standards of the rest of the country - from which it is separated by vast empty (from an industrial/capitalist point of view) spaces. See good website at
http://www.railways.pilbara.net.au/pilbararail.html
Notes - V2.0: fixed up known bugs, better industry distribution, shortened game to 30 years, shifted timescale to cover more interesting real events, improved topography, dropped Perth connection for gold (but still there for $2M bonus if you don't know what to do with your money!). Improved events - watch out for cyclonic flood damage at river crossings, and other things which can remain surprises - but think in terms of the area's idiosyncrasies.
My vision for this scenario was about building and running a reasonably realistic iron ore transport system, so I've blocked, restricted or booby-trapped the robber baron stuff. If your company debt goes over $2M, including negative cash, you will pay. I suggest you don't change companies or go bankrupt ... try if you wish. But you have been warned!
Industry distribution I have allowed to vary a fair bit; some combinations are easier than others. If it's not paying, try restarting - it helps a lot if you can produce food in that NW corner. There are worthwhile bonuses for large-scale iron transport.
Design: I tried to remain faithful to the area's geography and history. There are a couple of glaring deviations: in reality no passengers or other goods are carried (had to leave them in to simplify making money) and the local industries had to be boosted (for profit and interest). Spent a lot of time trying to make said industries behave sensibly; the game interprets industry percentages very liberally, and I had to end up pre-building the ports to ensure they are present. Had a lot of fun with the events - I think they all work. Beware of river flooding and bridge damage.
Many thanks to Mr Mathy for testing and constructive comments.
Feedback welcome! Is it too hard, too easy, too boring? Anything didn't work?
By Peter Bennet213 0 -
Goal: The Cairns-Hinterland rail system is negotiable only at certain river crossing & via Redynch & Kuranda. See if you can export some of the wealth!
Author's Comments: This map has been constructed so that you can only get inland by going up the Kuranda Range from Redlynch to Kuranda to Biboorah to Mareeba.
In this scene, there are certain places that you can only get across the river systems because of the way the rivers are constructed.
This is one of the challenges. Don't get frustrated but take things easily and test, test, test those gradings.
Also you should be able to construct the inland line from Redlynch without using a grade over 4.0 . If you grade colour indicator goes into the red, you know you are not on the intended rail routing.
I would suggest that the coastal system be developed first, as you will need some huge funds to construct this system to Mareeba and beyond.
200 0 -
'J' refers to the editor, Jeff Fisher.
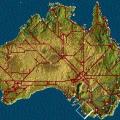
This is an updated version of the Australia map that comes with Second Century (post WWII Australia needing an electric rail system). Industry supply chains have been repaired. The economies of various regions have been thoroughly reworked. Events have been added so you can affect fuel and track prices by hauling (or failing to haul) certain materials (e.g. reduce electric rates by removing waste to prove you supplied electric/nuke plants).
No, the rails in the screenshot are not in the starting map. That's just a pic from a finished game.
By jeffryfisher398 0
